Even though some people are beginning to erase the DVD from using, they will still be with us for a while. There are lots of tools that will help you burn the DVD, but the best DVD burning software is Free Burning Studio.

The reason for that is the convenience and possibility to conduct test burning so that you can determine any potential error. However, one of the significant problems with burning DVDs is that it is challenging to create solid disc without any additional difficulty.
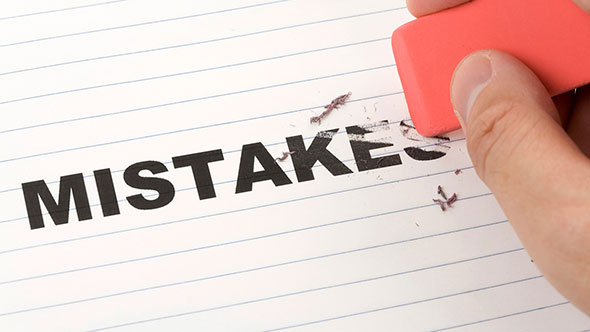
There are some mistakes that we most commonly make when we burn DVDs. We recommend you to read it through so that you can stop wasting valuable discs. We present you top five burning mistakes that you should avoid:
Mistake 1: Setting the Speed Too High
Most people when they use DVD burning software they have multipurpose optical drives and DVD burners. Even though these creations are fabulous and reliable, capable of writing millions of bytes of data per second under almost any circumstance.
However, the main problem that could interfere with the quality of the disc is the setting the burning speed. When you set it too high, then you create the groundwork for the mistake. So we recommend you to ensure that your DVD gets perfect copy, select the minimum speed and wait for a while.
It could be inconvenient because you will have to stay a few minutes longer, but it is better than burning another disc for the same thing.
Mistake 2: You Use Bad Media
As you may have noticed, there are different types of blank discs on the market. Some of them are cheaper while others are more expensive. You have probably wondered what the difference between them is. Not all of them have the same manufacturer and therefore quality.
So we recommend you to use the safest and best way to burn disc through DVD burning software is to find the one with the highest quality. Make sure that you get the most expensive DVDs that you can see around. Believe us, you will spend a little more than you have planned in the first place, but you will save lots of frustrations of making lousy DVD.
Mistake 3: Always Verify Your Disc
It is important to remember this particular error because many users fail to understand the importance of verification. It is the most common problem that most users face after the burning process. When you neglect the finalizing the software will immediately remove the disc from the tray.
However, you should have in mind that most programs such as Free Burning Studio feature “Verify” as the final step of burning. That way you will be able to check the disc for potential problems and to solve it before it is too late.
Mistake 4: You run too many programs during the burning process
People enjoy multitasking on their PCs. However, that is not the option during the burning process. When you want to make a replication of DVD, the risk of creating error is more significant in case that you have more programs opened.
When you have opened the browser, music player, and some game as well as burning software, you will reduce the power of DVD burner, and therefore it will reduce the quality of final product.
We recommend you to stop using everything before you start the burning tool. Try to minimize the number of programs that you run during the burning, and you will see the effects afterward.
Mistake 5: Using Outdated Drive
In case that you have an older computer, there is a possibility that you have an older firmware with bugs that will create errors. Therefore, you have to make sure that you update all firmware, drivers and burning software.
Sometimes burning software can create a problem, and therefore, you should find the one that will provide you a solution. The best choice is to use Free Burning Studio and enjoy.
User Questions

Question: I got an error after burning a DVD? What can I do to fix it?
Answer: The reason for your issue could be with your drivers, software, and hardware or speed that you have used during burning. Check each one at a time starting from drivers. However, you should have in mind that maximum rate is only for the computers with most excellent features. Therefore, we recommend you to use a slower speed and check what happens.
Useful Tip
Sometimes error in burning is not because of DVD burning software but because of malicious DVD. Therefore, we recommend you to check disks before you handle them. It is always better to do it before buying. First, start with any visual flaws such as cracks, scratches, blemishes, and peeling. That will save you lots of time during burning DVDs.

At the same time, dirt and dust could be the primary causes of errors. Therefore, you should keep your DVD burner clean and regularly dust it off to maintain it properly. That way you will avoid any further issues. You should also avoid touching the bottom of DVD.
Benefits of Avoiding Burning Mistakes
- Less Frustration – Burning errors will annoy you, and that is the fact. If you want to keep up with good work follow our guide and everything will turn out alright.
- Less Expenditure – When you start burning DVDs without errors you will reduce the number of DVDs that went to waste.
How to Burn DVD-Video with Free Burning Studio
Step 1: Download, Install and Launch Video Burner
First, we have to mention that Free Burning Studio is, as its name says, completely free. You will be able to download it directly from their website.
After downloading you will get the setup icon that you should double-click. Afterward, the installation process will lead you to recognize all terms and condition of using this great software. When you finish the installation double click on the icon that you will see on the desktop.
That way you will launch the burning wizard. The next step is to add a blank and writable DVD into a drive wait for it to appear.

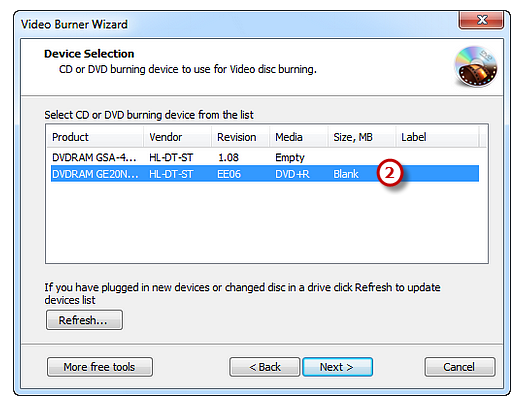
Step 2: Select Burning Device
You have to understand that burner will immediately try to list all devices that are available. Therefore, you have to choose the one that you inserted moments ago. In most cases, it is the default one.
However, if you still don’t see it click on “Refresh” button and that way you will update the possibility to see the new device. If that again won’t work, you should change the disc or inspect your drive.
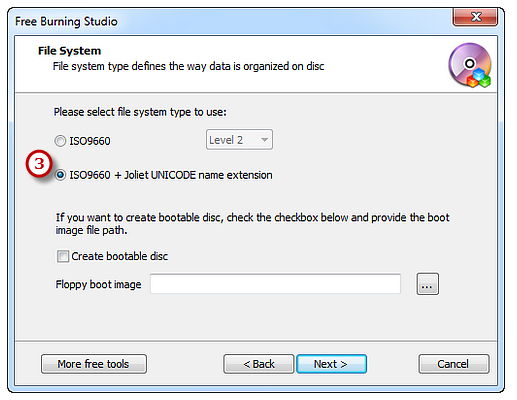
Step 3: Select Disc Type
As soon as you see the writable disc that you can use you can proceed to this particular step. Just tap on “DVD Video” that you will find in front of you. There will be three possibilities in front of you:
- Video CD
- Super Video CD
- DVD Video
In this particular case, you should tap on DVD Video to proceed further.
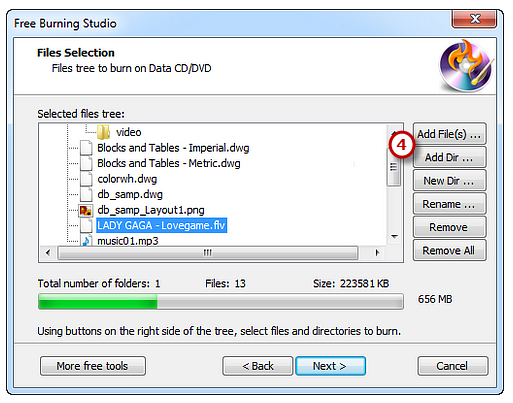
Step 4: Add Video Data
It is essential to find the video data that you want to burn on your video DVD. We recommend you to put everything that you want to burn before the process in one folder. That way you will have more convenience in finding the right data.
You will also have the review of selected file’s size and disc size.
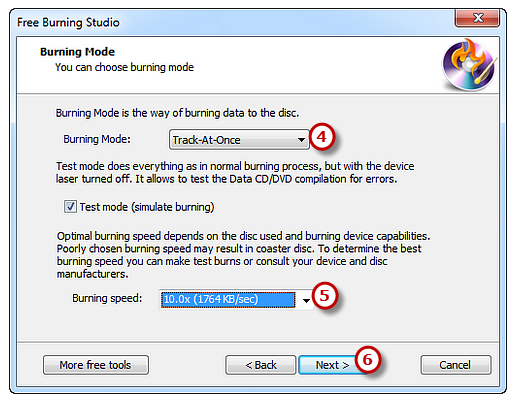
Step 5: Select the Burning Mode, Speed and Finally Start Burning
You can choose burning modes such as:
- Session Track-AT-Once
- Track-AT-Once
- Disc-AT-Once PQ
- Disc-AT-Once Raw P-W
At the same time, Free Burning Studio will give you the possibility to simulate burning to check for any errors. You just have to press “Test Mode” and wait for a few minutes until you get a notification that you can burn it without any additional problem.
Finally, you should choose the burning speed. We recommend you to select the lowest rate because you will get the minimal possibility of any error. Of course, the rate depends on your system capabilities which mean that you can find the appropriate speed.
Press the “Next,” and the burning will start immediately. After the process is complete, the disc will eject, and you can finally enjoy your video content. It is the most convenient way to burn DVD. Isn’t it?
Bottom Line
You should have in mind that burning errors are mainly your fault. That is not something that we say to discourage you because you can quickly fix what you’re doing wrong. You just have to follow this particular guide, and you will be able to understand everything that you have done wrong during the burning process.
Of course, it is mandatory to have DVD burning software that will handle everything you want. Some other things could help you determine how to burn DVD. Try Free Burning Studio, and you will be able to conduct test burning so that you can reduce the possibility of burning error.
If you have anything to say that we haven’t mentioned in this particular guide, feel free to comment on the section below.