Step 1. Activate ISO Burner
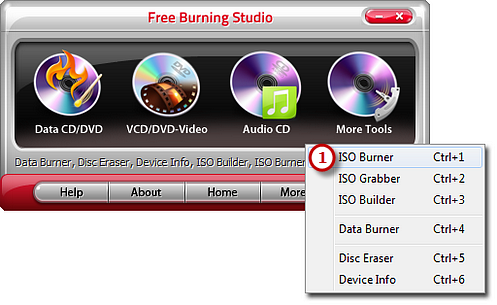
Launch Free Burning Studio. Insert a blank CD into the CD drive and click “More Tools – ISO Burner” to run the burner wizard.

Step 2. Select Burning Device
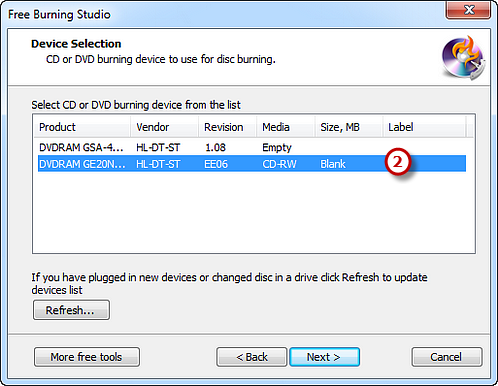
The burner will automatically scan your system and list the available devices. Choose one of the usable burning drives from the list (the system will select it by default if there is only one). Click “Refresh” to update the device list if you plug in new devices or change the disc in the drive.

Step 3. Select the ISO Image to Burn
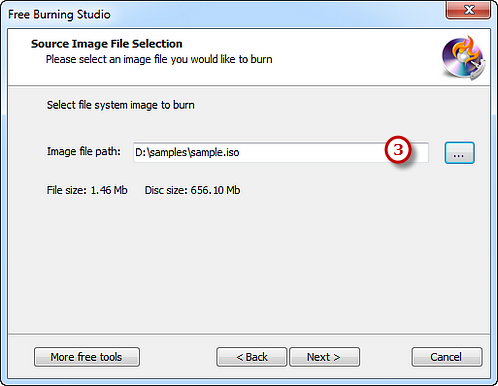
Click square button to select the ISO file you want to burn and you can have a review of the file size & disc size.

Step 4. Select Burning Mode & Speed and Start Burning
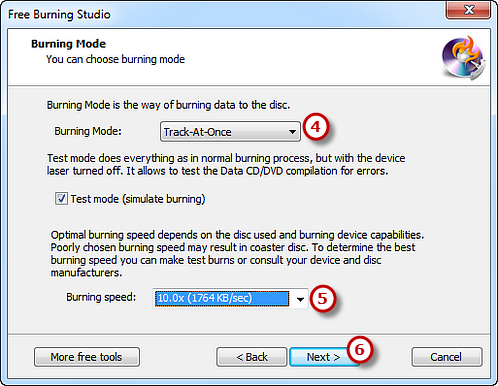
Select one burning mode from the Track-AT-Once, Session Track-AT-Once, Disc-AT-Once PQ and Disc-AT-Once raw P-W as needed . You are allowed to use Test Mode to simulate burning for checking errors. Then, choose the appropriate burning speed (Burning speed depends on the capabilities of your system and your drive). Click “Next” to start burning and wait until the process bar reaches 100%. The disc will eject after the audio CD has been completely burned.

